Painting the partially finished side of the basement was one of our last major projects in this house. It never was and never will be beautiful, but we felt a fresh coat of paint on the walls, ceiling, and concrete floor could spruce it up a bit. Here are a few "before" photos:
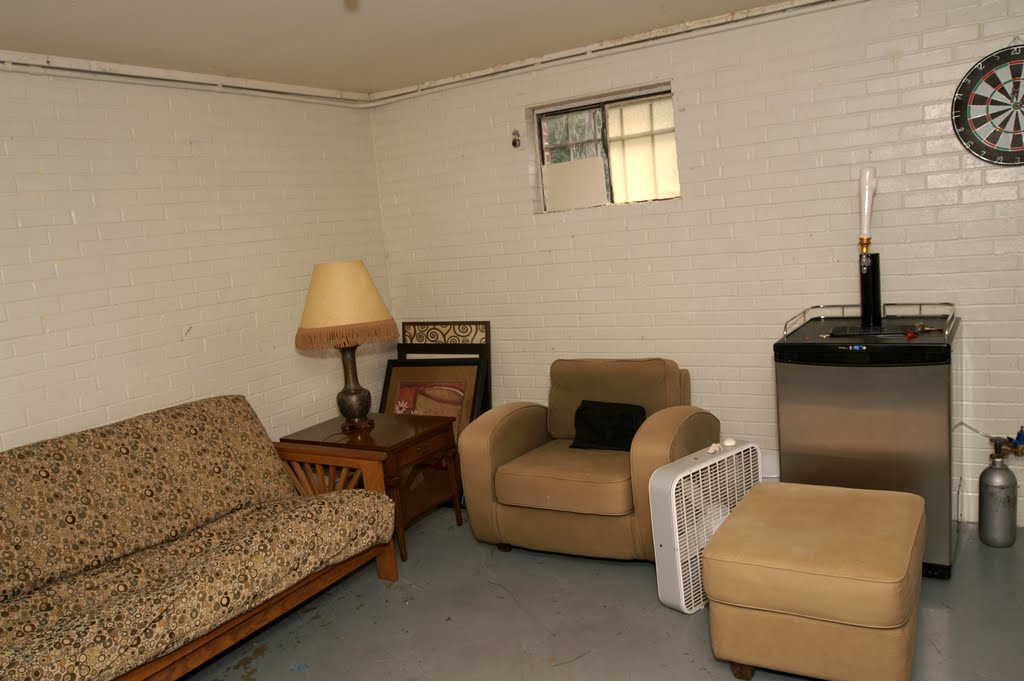 |
| Notice the dingy walls, spotted ceiling, and scratched-up floor. |
 |
| Ditto. Plus some filled-in holes in the wall. |
 |
| Yes, the brick wall in this room is pink. |
 |
| Notice the awesome fuse box cabinet. |
 |
| The stairs were particularly bad. Durham putty to the rescue! |
After patching the walls, we had to clear everything out of this side of the basement. We stacked it all on the unfinished side, where I have my shop and where we keep all our other junk, plus the washer and dryer. Of course the cats wanted to explore the new playground we built. Can you spot Ami the orange cat?


 <<--- There she is, next to the paper towels, on top of an upside-down chair. Of course, Mable needed to find a cozy spot as well. She ended up beneath the upside-down chair, on top of our dog Molly's old bed. Did I mention she does not like to be photographed?
I used a Graco Magnum X5 airless paint sprayer to do this work. I love this paint gun. If you plan on painting everything in a room the same color, you cannot beat the speed and quality of finish provided by a good paint sprayer. Unfortunately, the sprayer requires that absolutely everything that won't be painted needs to be taped or otherwise covered. This includes windows, fixtures, doors, floors, and anything else. It's a pain, but worth it.


 <<--- There she is, next to the paper towels, on top of an upside-down chair. Of course, Mable needed to find a cozy spot as well. She ended up beneath the upside-down chair, on top of our dog Molly's old bed. Did I mention she does not like to be photographed?
 |
| We taped plastic drop cloths on the door, windows, and floor. |
I used a Graco Magnum X5 airless paint sprayer to do this work. I love this paint gun. If you plan on painting everything in a room the same color, you cannot beat the speed and quality of finish provided by a good paint sprayer. Unfortunately, the sprayer requires that absolutely everything that won't be painted needs to be taped or otherwise covered. This includes windows, fixtures, doors, floors, and anything else. It's a pain, but worth it.
 Painting the stairwell proved to be a huge challenge. The ceiling was a good 15' high, so I had to rig up some ladders to reach it. I had a small step ladder against the door so I could get that part of the ceiling, and then leaned an extension ladder against the back wall so I could reach everything else. Not going to lie, it was pretty dangerous to be painting the ceiling by hanging back off the top of this ladder with a paint gun in one hand, wearing goggles that slowly got coated with paint. But, I couldn't think of a better way to do it. I held on tight and took a lot of breaks. I did two base coats and two finish coats. Each coat took about an hour. Not bad for painting the stairwell and two large rooms, including the ceilings. Here you can see how good the walls look, and how much of a mess the paint sprayer made on the floor. Good thing it was thoroughly sealed up!

 The sprayer creates a fine mist of paint that hangs in the air for a long time, necessitating a full breathing apparatus to filter out the mist. It was quite nice to be able to open the window after the spraying was finished.
To the right you can see the room with the tape and dropcloths removed. The walls look great; the floor, not so much. Moving on to the next phase!


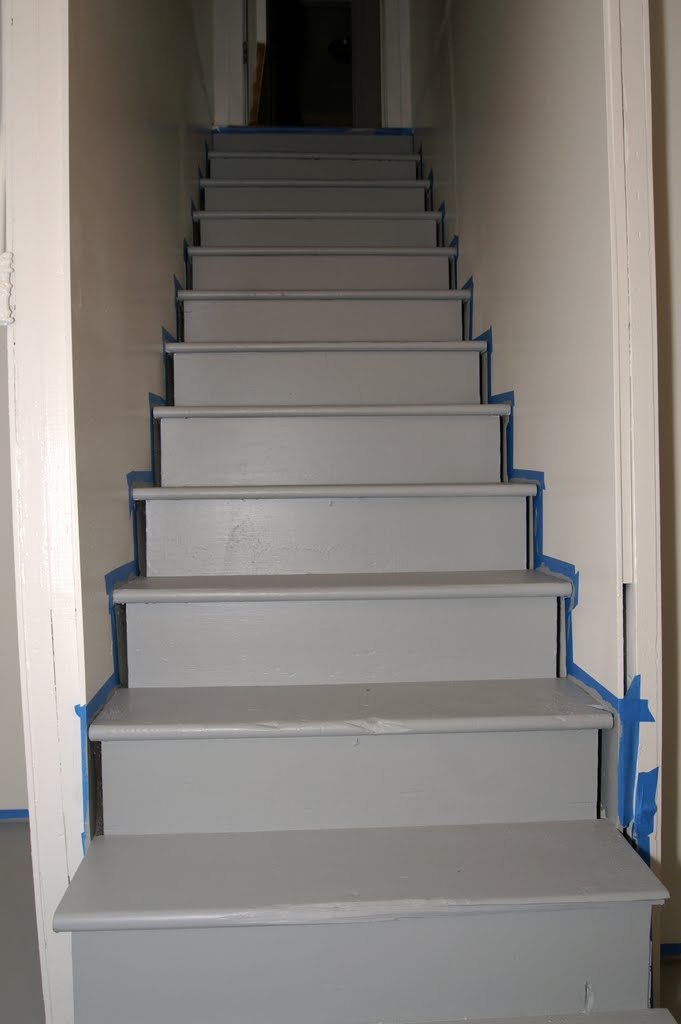
Here's a nice before and after of the stairs. The paint we used is a special porch / basement paint that is supposed to hold onto concrete in damp areas better than other paint. We'll see.
Below, you can see how I had to paint myself into a corner. The back door was my only escape after each coat was completed!

And finally, here is the basement after all the painting was complete. Nice walls, nice floor. Still have to remove that blue tape though...
Next up-- ceiling fans and new light fixtures!

No comments:
Post a Comment