 |
| A baby cucumber, one of the first of the season. |
I bought a variety of containers and plants at both Home Depot and Costco. Containers can be very expensive, so I recommend shopping around for the best deal. If you're relatively stable but still would like to garden in containers, make your own! I plan on making some if/when we get to the new house. I'll of course keep you posted. If you are going to buy, get the biggest and most durable containers you can afford. We're pretty much broke right now, so I got some junky plastic containers at HD colored to look like terra cotta. The Costco containers are nicer. They are made of some sort of resilient plastic or very dense foam colored to look like round concrete or stone pots. I think they'll last many seasons. While the plastic containers don't have the same gravitas as real terra cotta, stone, or cast pots, they are considerably lighter (which comes in handy when you have to move them to mow the lawn or clean around them).

To fill the containers, I gathered some organic material including grass clippings, leaves from last fall, and freshly pulled weeds to fill about half of the pots. I'm thinking it will break down and help to fertilize the plants over the course of the summer. Also, potting soil is darn expensive, and I didn't want to have to buy enough to fill all these pots. I then made a mixture of purchased potting soil, a soil conditioner, compost, and some cheapo topsoil and topped off all the pots. I've read that you can make your own potting soil, and hope to do so in the future, but we don't have a compost pile at this house so it's going to have to wait.
I bought almost all the plants at HD during one of their big sales. I did a mix of fast-growing seeds and potted plants, and of vegetables and herbs. We wanted to stick with the basics, since we had very limited space. Here is a rundown of all the plants we have in our containers:
- Tomato "Sweet 100"
- Tomato "Patio"
- Tomato "Early Girl"
- Red bell pepper
- Yellow bell pepper
- Jalapeno pepper
- Blueberry "Primadonna"
- Blueberry "XXXXX"
- Blueberry - mystery plant (no tag included)
- Cucumber "???" (from seed)
- Zucchini "???" (from seed)
- Summer Squash "???" (from seed)
- Sugar Snap Peas (from seed)
- Green Beans "XXXX" (from seed)
- Chives (from seed)
- Rosemary
- Thyme
- Basil
- Green onions (from seed)
- Cilantro
- Sage
- Oregano
- Alyssum (flower, from seed)
- Pansies (leftover from our winter planting)
- and one stray carrot
I packed the plants into each pot. Technically speaking they are overcrowded, but I was curious about how much I could grow in each pot if I paid close attention to watering and gave them some extra fertilizer. Yes, I'm using fertilizer--these definitely would not qualify as organic. When we get our real gardens going at the next house, we'll be 100% organic, but we're just not there yet. I tried to group plants according to their needs, and by size, so that they would be complementary. Some pairings seem to be working better than others. It'll take a few seasons before I am sure whether it's the combinations that aren't working, or the container size, or what.
Here is a container-by-container rundown of our container gardens so far this year:
 The first container we planted was really a replacement for the winter pansies as they died back. We started with basil (big plant on right), then added rosemary (big plant on left), and recently put in cilantro (tiny plant in the front). I also sprinkled some alyssum and some leftover beans in this pot. All plants are thriving so far. We use the basil and rosemary all the time in the kitchen. Sometimes I bring some rosemary in just for the aroma--it smells so good.

 Next up are the beans and blueberries. The blueberries are the main attraction here, but the beans have really helped. When we first planted the blueberries, they got burned by the sun, so I had to move them to a part-shade area. Now the beans have grown up enough so they provide some shade, and I was able to move the pot into the sun. Soon the blueberry bushes will outgrow the beans and they'll be exposed again, but I think they'll be OK now. The blueberry tags said we would get berries the first year, but I'm not holding my breath. We plan on transplanting them into the ground whenever we get a new house.

 The cucumber container is also doing well. I first planted four corners of herbs. In the left picture, flatleaf parsley is on the left and oregano on the right. In the right picture, sage is hidden on the left and dill is on the right. I sprinkled chives all throughout, and we've been cutting them regularly to thin them out. So far, though, the cucumber is the rockstar of this pot. I grew them from seeds, and unfortunately threw out the packet before recording what kind I bought. In any case, we already have four baby cucumbers, including the one you can see below:

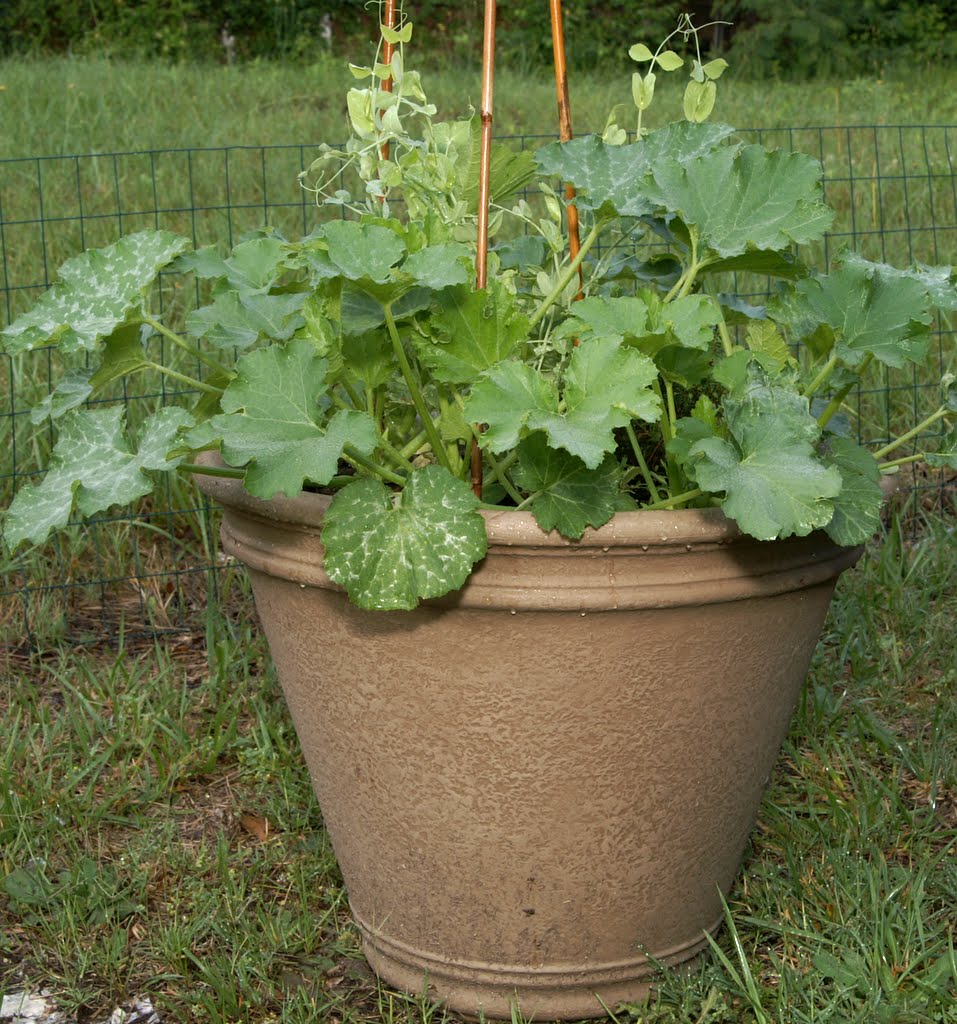
Moving on, I crammed some zucchini, summer squash, thyme, snap peas, and alyssum into one pot. I'm not sure how this is going to turn out. I think the snap peas will be fine, and maybe half the zucchini and squash, but it's really crowded in this pot already. The thyme is fine so far, but I've had to clip back some zucchini leaves to give it more sun. The squash and zucchini are getting ready to flower, so we should have some young fruit in two weeks or so. Below, on the left you can see the snap peas reaching above the fray, while on the right you can see the thyme tucked under the squash leaves.


Next we have a series of tomato planters. We love tomatoes, and they can be so expensive in the grocery store. We did three different varieties, trying to hedge our bets. No heirlooms, but next year if we're settled, we will absolutely be growing some German Johnsons and other crazy varieties in our garden.
The sweet 100s, shown to the left, shot up like a rocket and have already produced two tomatoes, at right, just 5 weeks after planting. This has been our most successful tomato plant so far, and it looks great.


We bought the "Patio" tomato plant (above, left) because it is called "the container tomato". Sounds great. So far, it hasn't done a whole lot, and the beans I planted with it are actually taller than it. Neither the beans nor the tomato plant look that great right now, but I'll give them some time to see if they come around. "Early Girl" (above, center) was supposed to produce small-medium tomatoes within 50 days of planting. We're on 35, and so far the flowers haven't bloomed yet, so we'll see. The beans in this pot look terrible. One is almost completely dead (above, right). Maybe "Early Girl" is spending her energy killing off the beans. We'll see who wins the battle.

 The pepper pot is doing quite well. We have two bell peppers and a jalapeno, along with some green onions. You can see the first baby jalapeno hiding in the onions at right. The first few bell peppers are visible below.
Here is a container-by-container rundown of our container gardens so far this year:


 Next up are the beans and blueberries. The blueberries are the main attraction here, but the beans have really helped. When we first planted the blueberries, they got burned by the sun, so I had to move them to a part-shade area. Now the beans have grown up enough so they provide some shade, and I was able to move the pot into the sun. Soon the blueberry bushes will outgrow the beans and they'll be exposed again, but I think they'll be OK now. The blueberry tags said we would get berries the first year, but I'm not holding my breath. We plan on transplanting them into the ground whenever we get a new house.
 The cucumber container is also doing well. I first planted four corners of herbs. In the left picture, flatleaf parsley is on the left and oregano on the right. In the right picture, sage is hidden on the left and dill is on the right. I sprinkled chives all throughout, and we've been cutting them regularly to thin them out. So far, though, the cucumber is the rockstar of this pot. I grew them from seeds, and unfortunately threw out the packet before recording what kind I bought. In any case, we already have four baby cucumbers, including the one you can see below:
Moving on, I crammed some zucchini, summer squash, thyme, snap peas, and alyssum into one pot. I'm not sure how this is going to turn out. I think the snap peas will be fine, and maybe half the zucchini and squash, but it's really crowded in this pot already. The thyme is fine so far, but I've had to clip back some zucchini leaves to give it more sun. The squash and zucchini are getting ready to flower, so we should have some young fruit in two weeks or so. Below, on the left you can see the snap peas reaching above the fray, while on the right you can see the thyme tucked under the squash leaves.


Next we have a series of tomato planters. We love tomatoes, and they can be so expensive in the grocery store. We did three different varieties, trying to hedge our bets. No heirlooms, but next year if we're settled, we will absolutely be growing some German Johnsons and other crazy varieties in our garden.
The sweet 100s, shown to the left, shot up like a rocket and have already produced two tomatoes, at right, just 5 weeks after planting. This has been our most successful tomato plant so far, and it looks great.


We bought the "Patio" tomato plant (above, left) because it is called "the container tomato". Sounds great. So far, it hasn't done a whole lot, and the beans I planted with it are actually taller than it. Neither the beans nor the tomato plant look that great right now, but I'll give them some time to see if they come around. "Early Girl" (above, center) was supposed to produce small-medium tomatoes within 50 days of planting. We're on 35, and so far the flowers haven't bloomed yet, so we'll see. The beans in this pot look terrible. One is almost completely dead (above, right). Maybe "Early Girl" is spending her energy killing off the beans. We'll see who wins the battle.

 The pepper pot is doing quite well. We have two bell peppers and a jalapeno, along with some green onions. You can see the first baby jalapeno hiding in the onions at right. The first few bell peppers are visible below.

Finally, we have a few random pots that are holding our leftover pansies from the winter. I poked a few extra bean seeds in them as well, but I don't think th wife is going to let them stay like this much longer. Time for some summer annuals, or maybe some coneflowers or black-eyed susans (my favorites). In any case, the gardens are really just getting started, and it promises to be a productive season. I'll keep you posted.


